Showing posts with label science. Show all posts

Friday, November 8, 2013

Review: Apologia Science -Exploring Creation with Chemistry and Physics

 photo logo_zpsd1be877b.jpg

We were very excited to be given the chance to review Apologia Educational Ministries homeschool science curriculum for grades K-6, specifically:
Part of why this was such an exciting review was because of the age range. All my children together happen to range from grades K through 6th. How often can one curriculum work for ALL 4 of your children? I worried that this would be over the younger ones heads, but figured the junior notebooking journal would really help.

Exploring Creation with Chemistry and Physics (Book) is the main textbook and can be used again and again. It is 253 pages, plus a supply list (for experiments), and an answer key. Written by Jeannie Fulbright, this is part of the Apologia Young Explorer Series (grades K-6), which also includes:
 photo chemistry2_zpsf5580e2f.png
  • Astronomy
  • Botany
  • Human Anatomy and Physiology
  • Zoology 1, 2, and 3
This hardbound text is broken into 14 lessons, and can be easily done in one school year at a pace of 1 lesson per two weeks. The lessons cover:
  1. Chemistry and Physics Matter
  2. Moving Matter
  3. Building Blocks of Creation (atoms)
  4. Compound Chemistry
  5. Multitude of Mixtures
  6. Mechanics in Motion
  7. Dynamics of Motion
  8. Work in the World
  9. Sound of Energy
  10. Light of the World
  11. Thermal Energy
  12. Electrifying Our World
  13. Mysterious Magnetism
  14. Simple Machines
The lessons range from 14-18 pages each and include many pictures and as many as 10 "Try this" experiments each. This means you could do a "Try This" nearly every day if you were following the two weeks per lesson pacing. Most of the experiments were using everyday household materials, so I didn't have to purchase any expensive kits. The lesson ends with a summary page, including questions and follow up activities.

One of the best parts of this text is the Christian worldview, but the conversational style is a close second. Jeannie Fulbright has a gift for writing in a way that kids want to listen to. She often explains complex processes in simple but entertaining narratives. For example: in the second Lesson, speaking of the states of matter and the energy of the molecules, she relates it to children with energy and wiggles, bouncing about a room. My 6-year-old really grabbed onto that concept and talks about it often. 

The Exploring Creation with Chemistry and Physics Notebooking Journal is a supplemental notebook to help with absorbing the text though hands on note taking and project building. Going a step beyond the "Try This" sections in the text, the notebooking journals include activities such as:
 photo notebookingjournal_zpsaa83790f.png
  • Vocabulary Crosswords
  • Fascinating Facts
  • Flap Books
  • Copywork
  • Test It Out
  • Fact Wheels
  • Tuck-in Envelopes
  • Various Projects and Experiments
  • Layered Books
  • Field Trip Sheets
  • Review section of narrative questions titled "What Do You Remember?"
  • And a Final Review consisting of 50 review questions.
 photo juniornotebookingjournal_zpsa179a078.pngOf course my favorite feature in the notebooking journal would have to be the lesson plans in the front of the book. This gives reading assignments for the text as well as matches up the Notebooking Journal pages to those same concepts. It breaks each lesson down into two weeks with two days of assignments per week. This homeschool science journal really expands on the text and helps with my more tactile students. This journal is ideal for upper elementary, grades 4-6.

The Exploring Creation with Chemistry and Physics Junior Notebooking Journal is just like the regular notebooking journal, except geared for younger children who have not mastered handwriting. Ideal for grades K through 3rd (lower elementary grades), it has all of the same hands on projects as the regular journal, but exchanges coloring pages for some of the more intensive journaling pages. The writing lines are larger, and the copywork is shorter. It worked really well for my two youngest to be working in this journal, while my two oldest used the regular journal. 

How we used this:

Because we have a 4 day school week, we chose to do science every day. I opened up the lesson plans in the front of the notebooking journals and divided the "Day 1" and "Day 2" assignments into two parts, and made the same week into 4 smaller assignments. We would gather together, and my two oldest took turns using the regular notebooking journal, while my two youngest shared the junior notebooking journal. After reading the assigned pages and filling in the journals, we took the time to try out and discuss some of the "Try This!" experiments. They were easy to do, and often used supplies we already had on hand.

Jeannie Fulbright's writing style was in a conversational upbeat tone, so was easy to read aloud to my children. Often my youngest (age 6) wasn't as interested in the journal, so would sit with me as I read and looked at the colorful pictures in the text. My oldest struggles with writing, but excelled at the crosswords. My second-born LOVES writing, so took her turn with the copywork pages. My third child, the 7 year old, liked the junior notebooking journal the best, so would color or cut and paste while I was reading. Gathered around like that, everyone had something to keep their attention. It was easy to get through the lesson, and to stop and discuss the concepts. 

Throughout the text in the chapter, the vocabulary words were bolded, so when the kids needed to define them for the vocabulary crosswords, they could find them used in context. We also used the vocabulary word lists as spelling lists, as a way to re-enforce them. 

One of the things I noticed about this text, vs. the other Apologia science curriculum we had tried, was that there are quite a few more pictures, engaging graphics, and "Try This!" boxes. As I mentioned before, you could do one of them every day and not run out. The engaging pictures made it easier to keep the kids interested in the text as we read. This was a big improvement over our previous course. 

Also, I had said I couldn't possibly use the Zoology book without the notebooking journal, but this one was different. The text alone had enough engaging and entertaining activities, that I think the notebookig journal could be completely optional, if you don't have a real need for your tactile child to have busy hands while you read.

Bottom Line:

We loved this, probably more than any science we've yet tried. I would probably buy the text alone, although the course schedule in the front of the notebooking journal was super helpful. Doing science as a family was a wonderful experience, and I could tell this program was designed with homeschool families at the forefront of the author's intentions. Everyone from grades K thought 6th at our house learned a lot (and also the teacher!) from this curriculum, and it was not difficult to adapt to all ages. The journals go very well with the text, and worked very well for us to keep everyone involved. We were blessed to try it out.

Be sure you check out all the other reviews of this homeschool science resource, by visiting the crew blog:


Photobucket


 photo DisclaimerGraphic1_zpsf612f371.gif
*Prices and links are accurate at the time this is published, and are subject to change


©2012-2013 Loving and Learning on the High Plains. All rights reserved. All text, photographs, artwork, and other content may not be reproduced or transmitted in any form without the written consent of the author. http://www.homeschoolhighplains.blogspot.com

Friday, August 9, 2013

5 Days of Fun Farm Science: Osmosis in Potatoes

*affiliate links may be included in this post, support our blog by reading the disclosure tab above.*

This week is our county fair, and the kids will be taking potatoes we've grown in our garden to show. I'll let you know how that turns out. :) In the mean time we were talking about osmosis. You know, the reason your fingers turn to raisins in the bathtub.  I found a fun illustration on the Supercharged Science website that explored this... using potatoes!


Osmosis in Potatoes

Materials:
4 thin slices of potato.
4 jars
water
salt
food coloring

Process:
We tweaked the experiment because we wanted to be sure we could "see" the water moving into or out of the potato slices. We did two glasses of water with food coloring, and two glasses without. We added salt to one of each color group. (about a Tbs per 2 cups)  We actually thought that maybe the potatoes would add their water to the salty water and that they would soak up the fresh water. What we discovered was the opposite.

After about an hour of soaking, we inspected the potatoes. The slices in the fresh water got more crisp (loaded with water), while the ones in the salt water became rubbery. They had given over their water to try and equalize the salinity of the water.

I hope you enjoyed this week of blog hops, and found lots of great ideas there. It was fun for us to discover the science all around us. No matter where you live, every detail of life shows it was created with an amazing design! 

Blessings, 
Laura

You can try a free sample of Supercharged Science today! 
Just click the banner below.


Be sure to click the image below to read all the other fun articles posted today!
Summer Blog Hop


©2012-2013 Loving and Learning on the High Plains. All rights reserved. All text, photographs, artwork, and other content may not be reproduced or transmitted in any form without the written consent of the author. http://www.homeschoolhighplains.blogspot.com

Thursday, August 8, 2013

5 Days of Fun Farm Science: Rubber Eggs

*affiliate links may be included in this post, support our blog by reading the disclosure tab above.*


Here on our little "farm" we have the greatest population of chickens. They outnumber our family 6 to 1. :) We've love how the eggs we collect are so different than what you see in the store. Our chickens lay brown, white, and green eggs. Yes, green! Every so often, we have a chicken skip the shell. The egg is perfectly formed in its soft membrane, but no shell.

We found a fun little experiment on the Supercharged Science website that illustrates this. We used one boiled egg and one raw egg just to see the difference... minus the shell.


Materials:
raw egg
hard boiled egg
two clean jars or water glasses
distilled white vinegar

Process:
We put the two eggs in the jar (we chose two different colors so we could tell them apart), and later decided on two separate jars. Then we covered them with white vinegar. Immediately we observed bubbles coming off of them. We learned that:
Vinegar has, among other things, a chemical called acetic acid (about 3% of it is acetic acid). Egg shells contain calcium carbonate. Calcium carbonate in the egg shell reacts with vinegar to form carbon dioxide (can be seen as bubbles in the vinegar). -Ask the Van
After 4 hours the shells were quite thin, but it took a full 24 hours for them to completely dissolve. There was nothing left but some shell colored (brown in this case) sediment on the bottom of the jar. We inspected the eggs (including a bounce test for the boiled egg!) and then we cut them open. It was easiest to inspect the membrane on the raw egg. It was amazingly thick and tough! I now know why that membrane is so important, it keeps germs and everything out!

When we split the eggs, we were amazed that they didn't really even smell like vinegar inside. We still didn't eat them. ;)

Feel free to try it yourself! Would a store bought egg have more or less shell to dissolve? If you do, let us know how many hours it takes! I'd love to hear from you.

You can try a free sample of Supercharged Science today! 
Just click the banner below.


Be sure to click the image below to read all the other fun articles posted today!
Summer Blog Hop


©2012-2013 Loving and Learning on the High Plains. All rights reserved. All text, photographs, artwork, and other content may not be reproduced or transmitted in any form without the written consent of the author. http://www.homeschoolhighplains.blogspot.com

Wednesday, August 7, 2013

5 Days of Fun Farm Science: Gas Ripened Tomatoes

*affiliate links may be included in this post, support our blog by reading the disclosure tab above.*

Often grocery stores buy gas ripened tomatoes. The tomatoes are picked green for easy transport and are exposed to ethylene gas to ripen them. While they don't taste as great as vine ripened, they do last longer. Last summer my tomatoes had a late start and didn't ripen on the vine before the frost. So I picked them all and put them in boxes in the basement, and used them as they ripened up.


When we went on a field trip to a grocery store a while back, the grocer explained to the kids that he keeps the fruits and veggies in separate walk-in coolers, so that they don't ripen too quickly. This led us to another great science experiment we found on the Supercharged Science website. We've had large green tomatoes on the vine for a couple of weeks now... but none have ripened. So here's what we did to illustrate the concept.

Materials:
3 Green tomatoes
Ripe banana
Ripe Peach
3 paper bags

Experiment:

In the first bag we placed a green tomato. In the second bag we placed a green tomato and a very ripe peach. In the third bag we placed a green tomato and a banana. We checked them daily and didn't see any changes, but finally on the 9th day we began to see a blush of pink on the tomato that was bagged with the peach. By then the peach was moldy. The one with the banana didn't change at all. So Mayda ate the banana, and we were happy with our blushing tomato. :)

The tomato finished ripening up on the counter top, and when it was completely ripe the other tomato was still green. It was like the "ripen" switch had been turned on! We did a taste test with the forced ripe garden tomato and a store bought "vine ripened" tomato... and ours still tasted WAY better. :) The second tomato ripened up exactly 10 days later.


You can try a free sample of Supercharged Science today! 
Just click the banner below.


Be sure to click the image below to read all the other fun articles posted today!
Summer Blog Hop


©2012-2013 Loving and Learning on the High Plains. All rights reserved. All text, photographs, artwork, and other content may not be reproduced or transmitted in any form without the written consent of the author. http://www.homeschoolhighplains.blogspot.com

Tuesday, August 6, 2013

5 Days of Fun Farm Science: Milk Fat Trick

*affiliate links may be included in this post, support our blog by reading the disclosure tab above.*

Here at our house we enjoy lot of good farm fresh milk with all the cream. We even regularly visit the farm where we pick up our milk, and recently had the chance to admire a sweet new jersey calf.

This fun science experiment uses milk to show how soap molecules work. It works especially well with full fat milk, which is what we get when we shake up a fresh jug of farm fresh milk. :)

Because we learned that:
Soap is actually a very long molecule that has one hydrophillic end and one hydrophobic end. The water sticks/bonds with the hydrophillic end and the oil sticks/bonds to the hydrophobic end. Two opposing molecules with the soap in the middle. -About.com
... we found a fun experiment via Supercharged Science that illustrates this action. Here's our version of what we did. (you know we had to tweak it!)

Materials used:
  • whole milk 
  • water mixed with cornstarch (about 1/2 tbs to 1 cup)
  • food dye
  • bowls
  • liquid soap
In one bowl we had whole milk, and in the other bowl we put the corn starch mixture (which is milky, but has no fat or oils). We added the food coloring and then a small drop of soap. It was amazing to watch the swirls of color as the soap molecule was "searching for fats" with one end and "searching for water" with the other. It continued to swirl for quite a while. The corn starch only swirled for a second or two from the disturbance. There was no fat to "chase". It was fun to come back later and add one more drop of soap. The  burst of color swirls started all over in the milk! No reaction in the other bowl.


You can try a free sample of Supercharged Science today! 
Just click the banner below.


Be sure to click the image below to read all the other fun articles posted today!
Summer Blog Hop


©2012-2013 Loving and Learning on the High Plains. All rights reserved. All text, photographs, artwork, and other content may not be reproduced or transmitted in any form without the written consent of the author. http://www.homeschoolhighplains.blogspot.com

Monday, August 5, 2013

5 Days of Fun Farm Science: Carbon Dioxide and Photosynthesis

*affiliate links may be included in this post, support our blog by reading the disclosure tab above.*


Photosynthesis is a big part of life here on our hobby farm. We have a huge garden, and a field full of corn (thanks to our neighbors' help). My kids understand pretty well about plants using the sun. We were talking recently about what plants take in and what they put out. Pretty simply out: a plant takes in the carbon dioxide in the air, and with water and energy from the sun transforms it to oxygen and glucose (plant sugar).

Through Supercharged Science we found the idea of this experiment to see if a plant in a closed space can add enough extra oxygen to keep a candle lit longer.

Materials we used:

  • candle in a short base (and a way to light it)
  • large glass jar
  • pie pan of water
  • stopwatch
  • leafy plants of various sizes
The kids theorized (as did I) that the candle would stay lit slightly longer with the plant inside.

We did created a closed system by inverting the jar into a pan of water which the lit candle was setting in. We used a gallon jar and we repeated the entire progression of steps twice.


  • With nothing in the jar the candle extinguished in 1.13 min. on our first try, and 1.01 min the second time. 
  • With a small piece of kochia plant it extinguished in 55 seconds and 44 seconds on the second round.
  • With a large plant of kochia (filling 1/4 of the jar) it took 53 seconds and 46 seconds.
  • With a sunflower leaf (large) it took 45 seconds.


It seems the leaves displace more oxygen than they can replace in less than a minute, although the large kochia was slightly better. We also observed a cool effect of the vacuum pulling water up into the jar!

Even though our theory was disproved, we illustrated an important point in doing science experiments: minimizing variables.

You can try a free sample of Supercharged Science today! 
Just click the banner below.


Be sure to click the image below to read all the other fun articles posted today! I'll be posting something new every day this week. :)

Summer Blog Hop

©2012-2013 Loving and Learning on the High Plains. All rights reserved. All text, photographs, artwork, and other content may not be reproduced or transmitted in any form without the written consent of the author. http://www.homeschoolhighplains.blogspot.com

Wednesday, July 31, 2013

Review: Brain Food Learning

 photo 31477_411332758959489_253604783_n_zps2cd64016.pngThe kids were excited when we were sent a free copy of the DVD The Fascinating World of Insects by BrainFood Learning. This video retails for $14.99, and is for any age, but it was most appreciated by my younger two (ages 5 and 7).

The kids have watched it multiple times now and they all really liked it, so that's pretty encouraging. We often watch shows only once. I sat down and watched it with them too, and I even appreciated it. The graphics are a collage of live video and still photos, but tastefully done. During the whole thing the music has a jungle sound which I thought was ok, but my 5 year old deemed "scary".

The main menu gives you the option of jumping to the insect features or the review sections, but we just go with "Play All". The introduction starts with an overview of insects and how they are diverse and everywhere.  It goes over the main parts of the insect including: legs, head, thorax, abdomen, compound eyes, antennae, and exoskeleton. They also highlight the different mouth types: piercing/sucking, sucking, sponging, and chewing.

In the next section they talk about 11 different insects in detail. When each one is introduced, the name of the insect is shown in print to re-enforce the name, like a flashcard. Five or six interesting facts are presented about each one, and the section is finished with a related vocabulary word and its definition. Insects detailed on this DVD are:

     photo insects_front_500__981921320383955300400_zps866e5588.jpg
  1. Grasshopper
  2. Ladybug
  3. Rhino Beetle
  4. Firefly
  5. Mosquito
  6. Honey Bee
  7. Water Strider
  8. Ant
  9. Praying Mantis
  10. Dragonfly
  11. Butterfly

The matching vocabulary words were:

  • Entomologist
  • Species
  • Elytra
  • Larva
  • Scientific Name
  • Proboscis
  • Pollination
  • Adaptation
  • Colony
  • Predator
  • Wingspan
  • Metamorphosis

I did notice the definition of "Adaptation" was given incorrectly, as "Special features developed over a long period of time." The correct definition is The process of being adapted (To make suitable to or fit for a specific use or situation). This is important for me since we teach creation-based science in our home, and with the creation mindset we view "adaptation" as a rapid process designed by God. I felt this was something to note, but not anything upsetting. My kids are pretty quick to pick up on discrepancies like this since we like to watch many science documentaries. It's a great springboard for discussion.


The third part of the show is the Review. This includes:

  1. Review Flashcards. These show the picture of each of the 11 insects covered and repeating the insect name twice.
  2. Review your Insects. Photo of each insect with multiple choice answers.
  3. Parts of an Insect. 
  4. Insect Facts. Reviewing a fact presented with with multiple choice answers of the different insects it could be. My kids quickly figured out these facts were presented in the same order as the insects were presented on the DVD, so they knew exactly which one would be the next right answer. It would have been less predictable if they had been mixed up. 
  5. Vocabulary Review. Presenting the vocabulary definitions with multiple choice answers.
My 7 year old had no trouble answering all of these. My 10 year old was the one who figured out the patterns.

Update: I also received an email from the folks at BrainFood Learning, and was excited to find out that they have developed free lesson plans to go with the videos. You can download those here. They include:


  • A two page lesson plan
  • A "circle the right word" quiz
  • An insect card sort (including full color photos)
  • Academic vocabulary quiz
  • Insects Quiz (multiple choice)
  • Big Words Quiz (multiple choice)
  • Answer Keys

What I liked:
  • This was a fairly well done short video for kids to get them interested in the world of insects. 
  • It fit really well with what my younger two had just been studying in science. 
  • The facts presented about each insect were interesting and different than the usual. 
  • It kept the kids attention.
  • Free lesson plans!

What I didn't like:
  • The music.
  • The evolutionary terminology. I found it in three different places.

Bottom Line:
This DVD is a great way to get kids (especially in the younger elementary grades) interested in the wide world of insects. There are a few places where evolutionary terminology creeps in, but it wasn't a major component. The images were colorful, and the review questions helped gauge how well the kids were paying attention. Overall I thought it was a fun show. 


Visit the Crew Blog to read other's thoughts on this DVD as well as two others:

Photobucket

©2012-2013 Loving and Learning on the High Plains. All rights reserved. All text, photographs, artwork, and other content may not be reproduced or transmitted in any form without the written consent of the author. http://www.homeschoolhighplains.blogspot.com


 photo DisclaimerGraphic1_zpsf612f371.gif
*Prices and links are accurate at the time this is published, and are subject to change.

Friday, July 26, 2013

School Year in Review: 1st Grade

*Affiliate links may be included in some posts, see my Disclosure tab above. *

Mayda was our 1st grader during the 2012-2013 school year. This year she really got into the enjoyment of reading, and even took on her first short chapter books. We used some books we already owned, and then during the second semester we used several provided by the TOS Review Crew. Mayda finished all of her work well before the 1st of May (started on Labor Day). She has been having a ball with the summer reading program, softball, and also getting ready for the 4H exhibits at the fair.

Click any image to view it on Amazon!

Here's my review of the 
books we used this year:

Phonics:
Mayda used Spectrum Phonics this year, which was a change for us. My older two had always used Christian Liberty Press Phonics, but I needed something quick and inexpensive. This was my first time using it, and I was very pleased. It has simple 2 page a day pace and she quickly worked through the basic phonics rules. The pages were well laid out and the pictures were colorful. It wasn't too easy, but she didn't struggle or cry about it. I would gladly use it again, and likely will with Wyatt.

From the website:
The lessons, perfect for students in grade 1, strengthen phonics skills by focusing on consonant blends, short and long vowel sounds, matching words, pairs, rhyming sounds, and more! Each book features full-color illustrations and provides essential tools for achieving reading fluency. They are also aligned to national and state standards and include a complete answer key. 

History
We used the American People and Nation from Christian Liberty Press for Mayda this year, as we had with Tyler and Emma when they were in 1st grade. All three kids found it a bit dry reading, but Mayda worked through it better than the other two. By next year I plan to find something different for Wyatt.  


Spelling/Reading

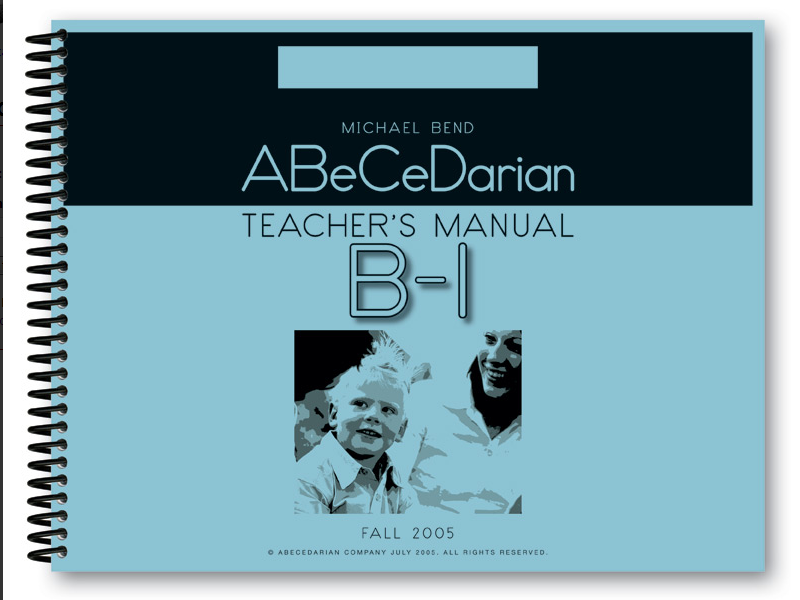
Mayda had the opportunity to review ABeCeDarian Co.'s Student Workbook B1  This book is 24 lessons broken into 12 units. My biggest worry with her was that she is a sight reader. She glances at a word and knows what it is without reading it. She completely skipped the sounding-out-to-blending stage. She had memorized by sight SO many words that she seemed a great reader. But I know a time will come she will hit words she hadn't seen before, and be at a loss to know how to break them down. 

We loved this workbook because it makes her work with the sounds individually. The exercises where she sorts words into lists are really important. She is learning that several letter combinations can make the same sound, and is really slowing down to focus on them. 

Some other exercises had her focus on word lists where only one sound changes from one word to the next. This was actually really hard for her to identify, because of the way she had been reading. It is really breaking through the "code" that reading really is, helping her slow down and really put some muscle on her reading skills.  

Mayda read all of the storybooks, and loved them. Her excitement was really encouraging to Wyatt who is beginning to read the same books. She is also doing the workbook at the same pace of two lessons per week, breaking each lesson over two days. Although 6 pages in one sitting was not too much for her, the only thing she didn't like was that this was "work" compared to how she had been reading. I'm happy about this; she needed a challenge! Even though she tells me she doesn't like it, she chooses this subject to start with every day.  

Each day she pushed farther in the book than I asked her to do, and by the end of the review period we had picked up our pace to a lesson or more per day. I think initially we had moved more slowly through both books because I was struggling to absorb all the teaching materials. But as we used it more, the lessons became routines, and the kids became excited with the progress they were seeing.

Math
At one of the local school closings, I had been really thankful to snag a copy of Addison Wesley Mathematics (Gr 1) for Mayda. We really liked the consumable workbook style and it put her well into the next level in Math skills. I'd use it again if I could find an affordable copy.


Mayda also had the chance to try out a copy of Math Rider (a computer math game) during a TOS review. It was a huge help to her basic math computation skills. She increased in her addition proficiency by 49% and her subtraction proficiency by 28%. 
Math Rider is a fun game that can easily help kids memorize their math facts quickly. It is easy to use, adapts to their needs, and rewards kids for mastering a function. There are magical elements to the story-line I don't appreciate, but the kids and I talked about those things and moved on, since the were only just part of the story, and not part of the game-play. I think all of my kids benefited from trying out Math Rider. Even I benefited from trying it out, having facts I knew, now on "rapid recall."


Science
Mayda and Wyatt worked through this Science book together. My Father's World from Christian Liberty Press uses the days of creation as a chapter framework as they study creation as a whole. The activities are simple and there are questions to review at the end of each chapter. This one goes well with taking regular nature walks.


Geography:
For Geography we used Continents and Oceans from Evan-Moor. It is the perfect introduction to basic Earth geography. This is an important subject for my kids and I love this book as a way to lead in.

From the description:
Volume 3 of Beginning Geography contains materials and projects to help children become familiar with the continents and major bodies of water on Earth. They are introduced to some facts about each continent, such as major mountain ranges, rivers, and indigenous animal species. Other exercises include naming the oceans and continents, and directions on a compass rose. There are reproducible animal, continent, and question cards for use in learning games such as Continent Concentration, Match Up, and Bean Bag Toss. Also features two-sided, full-color pull-out poster that has a map of the world on one side and a "Where in the world do they live?" animal quiz on the other side.
You get reproducible activity sheets, teacher resource pages, and cards. Complete step-by-step instructions for each project. All 16 pages perforated for easy removal. 

 Art:
Mayda really enjoyed playing Go Fish with the Impressionist Artist cards from Birdcage Press. She very quickly memorized the names of 36 art pieces and picked out her favorites too. It was a fun way to get her interested in Art.

We also had a wonderful visit to the Nelson-Atkins Museum of Art in Kansas City. We are currently reviewing a new book, Global Art, for the crew (review out soon!), and she has been enjoying doing a number of projects with it. 

Bible:
Sometimes the disciples are the teachers, and this year I had a day like that with Mayda as we studied through our Bible curriculum, Studying God's Word "B" from Christian Liberty Press.

Here's an excerpt from my recent post about that. (please click through to read the whole story)

Two weeks ago. There was so much to do. It was a busy week, and it was my turn to cook for the Awana crowd. Tuesday's school lessons were a blur, but Mayda was motivated by something or other to get caught up. She was behind in Bible. Yes, the Bible curriculum that I had said I wasn't going to use; she really likes it. After failing to click with her two older siblings, this one clicks with her. The lesson that day was about sin. Not sin you commit, but the sin of omission. Knowing to do something and not doing it. I wanted to hurry through it, but she had figured out how to listen to the Bible readings on the smart phone... so she looked them up, and we read Matthew 25:31-46. We talked about what it means to serve Christ through serving others, and how a heart obedient to Him will follow His leading. Mayda pondered that for a bit and she said, "I want to bake some bread."
. . . Mayda and I went on through to the kitchen where the woman was sitting, and she was completely taken by surprise. I told her how Mayda had wanted to bake her bread. She turned to her grandson and then back to me, and gesturing to the crust of bread on the counter, said:
"I just told him this morning that I was going to need to order more bread!"
We exclaimed together that God had heard, and placed an order with Mayda, who was beaming now (but hiding behind me out of shyness). She wanted to pay her, but Mayda told her it was a gift. I couldn't have been more proud of my girl.
And in my heart I was humbled. How many times have I had the thought to minister to someone: to drop someone a note, or to give a quick call? Did I do it?
I have been given a mission field, and it is here. And I have so far to go, in teaching them... and I will begin with the lesson of listening. Listening to that still small voice that prompts us to love, and to be the love of Christ. In our home. In our community. In our world.
Even if that lesson came from a child, a good humbling, and a a few loaves of bread.
~~~~~

AWANA stands for Approved Workmen Are Not Ashamed, taken from 2 Timothy 2:15:

"Be diligent to present yourself approved to God, a worker who does not need to be ashamed, rightly dividing the word of truth."

The best part of the Awana format is that it teaches Biblical truths with Scripture memorization to back it up. I want my kids to know what they believe, and the Biblical basis for "WHY?" as well.

I am really proud of Mayda as she finished her 2nd Sparks book with enough time to go through it completely again for a review. Of all the Sparks, only a handful did this. It was awesome.


Overall Mayda had a great year and is looking forward to the 2nd grade this fall. 

Blessings, 
Laura

Linked:

©2012-2013 Loving and Learning on the High Plains. All rights reserved. All text, photographs, artwork, and other content may not be reproduced or transmitted in any form without the written consent of the author. http://www.homeschoolhighplains.blogspot.com

LinkWithin

Related Posts Plugin for WordPress, Blogger...