Sunday, June 30, 2013

First 5K

Yesterday I participated in my first ever 5K.  I've been trying to train for one off and on since last November. I started training, then quit sometime mid January. I began running again in late April, and got serious about it by the end of May. All of June I told myself I was going to do this, but all this week I was trying to talk myself out of it. I'm SO glad I didn't.

It was a great time at the United Way Color Dash! I couldn't have picked a more fun outing for my first 5k. I'm hooked now. I am looking forward to whatever next race comes up. By the end of the race I was still going and ready for more. Most of my workouts are a mind game of trying to to quit just short of my goal. So, needless to say I was surprised. I wish I'd have pushed harder for a better time, but I was worried I'd run out of gas. Next go round it will be faster.

It was a fun time and a great adventure! At every turn someone was throwing "color" (dyed cornstarch)! I even had it in inside my ears. lol! I am thankful for friends who prayed me on, encouraged me not to quit, and showed up to run along or to cheer. That made all the difference!


Hebrews 12:1-2Therefore, since we have so great a cloud of witnesses surrounding us, let us also lay aside every encumbrance and the sin which so easily entangles us, and let us run with endurance the race that is set before us, fixing our eyes on Jesus, the author and perfecter of faith, who for the joy set before Him endured the cross, despising the shame, and has sat down at the right hand of the throne of God.


Linked:

Scripture and Snapshot

©2012-2013 Loving and Learning on the High Plains. All rights reserved. All text, photographs, artwork, and other content may not be reproduced or transmitted in any form without the written consent of the author. http://www.homeschoolhighplains.blogspot.com

Thursday, June 27, 2013

Using my smartphone to get smart on groceries!

~affiliate links may be included in this post, see disclosure tab above~


I'd been using the Endorse app on my phone for quite a while. Sadly this week they discontinued it's service. Over the 2 years, I'd earned over $200, so I was sad to see it go. So I switched to a new app or two and have been loving it! Here's the low down on what I've learned (so far) on using apps to save money while shopping:

iBotta - This app works on any smartphone, and is a digital coupon type app, but has high value bonuses for sharing the app with others. It also offers store-specific coupons, and at times extra bonuses for using them. (like this week there's about an extra $3 you can earn for using certain Target coupons through the app). These are not coupons that come off of your total at the register, but more like refunds you get after submitting your receipt. Be sure to use the checklist in the store, and verify the barcode of items you buy before you buy them.. just to be sure you matched it right. It's very easy. I earned $23 the first week of use, and it was sent right to my paypal account.

Shopkick - I'm still new to this one, but you collect points in the form of "kicks" by shopping in certain stores and for certain products. the "kicks" can be turned in for gift cards and rewards. You can earn the "kicks" pretty quickly in chunks of 2,500 or more depending on what you are doing, like referring friends. This one requires your phone location info, so that's why I haven't used it much. I don't prefer to leave my GPS on, as it eats my battery. Thankfully I do have unlimited data.

Safeway - I LOVE this app. If you have a local Safeway or affiliate, this one connects to your store card and lets you load coupons for use in the store. It gets even better if you have a matching paper copy of a manufacturer coupon. I love the "Personal Deals" If you don't have a smartphone to add the app, you can still add the coupons onto your card via the website. I typically save 30% to 50% off of my groceries with this app alone!

So, what do you use to save money? I'd love to know; Leave me a comment!

Frugal Family 2013-Laura

©2012-2013 Loving and Learning on the High Plains. All rights reserved. All text, photographs, artwork, and other content may not be reproduced or transmitted in any form without the written consent of the author. http://www.homeschoolhighplains.blogspot.com

Wednesday, June 26, 2013

Wordless Wednesday: Carshow

For Father's Day weekend we attended a local classic car show. I'm pretty sure that more of us than just daddy enjoyed it. :)


Linked:

Wordless Wednesday on Only Passionate Curiosity


@ 5 minutes for mom


©2012-2013 Loving and Learning on the High Plains. All rights reserved. All text, photographs, artwork, and other content may not be reproduced or transmitted in any form without the written consent of the author. http://www.homeschoolhighplains.blogspot.com

Monday, June 24, 2013

Dairy Free "Frog Eye" Salad

We love this salad for picnics because so little in ingredients can make SO much. My kids love it because it has a cool "gross" name. ;) I love it because it includes healthy fruits and can be made in advance and refrigerated. My hubby loves it, but had trouble with the dairy in the original version. We found a way to switch it up and give it a nice tropical boost.

Dairy Free "Frog Eye" Salad

  • 3/4 cup sugar
  • 1 Tbs. flour
  • 1/2 tsp salt
  • 2/3 cup pineapple juice
  • 1 egg (beaten)


Stir dry ingredients together,in a small sauce pan then add the juice and egg.  heat over medium heat until thickened. Remove from heat and add:

  • 1 tsp. lemon juice

Let cool. In the mean while, cook:

  • 1 box of Acini Di Pepe pasta (16oz). 

When done, rinse with cool water and drain. Stir in the juice sauce and:

  • 1 can of coconut milk
  • 2 (11oz) cans of mandarin oranges
  • 2 (20 oz.) cans of crushed pinapple
  • 2 cups mini marshmallows

Mix and Chill. Will fill a large salad bowl. Optional stir-ins include:

  • 1 cup flaked coconut
  • maraschino cherries
  • nuts
Linked:


©2012-2013 Loving and Learning on the High Plains. All rights reserved. All text, photographs, artwork, and other content may not be reproduced or transmitted in any form without the written consent of the author. http://www.homeschoolhighplains.blogspot.com

Saturday, June 22, 2013

Review Previews

We are halfway through our Crew year and I'm excited about all the reviews we've had the opportunity to do! In case you're new here, check out my "Homeschool" tab where all the reviews are linked, and I update often with the list of reviews we are working on for the future. :)

Here's what I have there so far:

Reviews For the CREW:


I hope you check back often to see what's new! I will also be reviewing some of last year's books I purchased myself. Hopefully every Friday over the month of July, so be looking for that too! In August I'll be joining a blog hop with a theme of science experiments! So much planned, so don't give up on me during a crazy ball season. Tournaments are just around the corner!
-L


Disclaimer:  I received a free copy of these products through the Schoolhouse Review Crew in exchange for my honest review. I was not required to write a positive review nor was I compensated in any other way. All opinions I have expressed are my own or those of my family. I am disclosing this in accordance with the FTC Regulations.

©2012-2013 Loving and Learning on the High Plains. All rights reserved. All text, photographs, artwork, and other content may not be reproduced or transmitted in any form without the written consent of the author. http://www.homeschoolhighplains.blogspot.com

Friday, June 21, 2013

Review: Baker Publishing Group, Lily Books (fiction)


 photo bakerpublishinggroup_zps1f16c878.jpg
We were so thankful that Baker Publishing Group sent us free copies of the two first books in their Lily Lapp series: Life with Lily and A New Home for Lily. These books are written at a 8-12 year old reading level, but I actually enjoyed them completely as an adult. They both sell for $12.99.
 photo anewhomeforlily_zps899a6825.jpg
I was particularly excited to get these books, as I grew up in Lancaster County, Pennsylvania, home of MANY Amish and Mennonite folk. As a child we used to joke that you could find our house because it was the only one (on our street) with power lines running to it. I ran around with my barefoot Mennonite friend on my neighbors' farm, and I witnessed their life firsthand. As a 7 year old in that world, I saw many of the same things Lily Lapp did. These books were a delicious retreat into my own childhood!

I must also note, I very rarely read Amish fiction. Whenever I do I am disappointed that it is just another fictional author trying to capitalize on the popularity and fascination the public has for these amazing simplistic folk. These books were a delightful surprise. The facts and stories are accurate and real, drawing from Mary Ann Kinsinger's own real life childhood memories.

My daughter, Emma, and I read these books. We actually raced to finish the first book, and Emma beat me through it, winning a candy bar in the bet. ;) I finished the second book before her. I had to win once. It was easy to do. Though the first book is 280 pages, and the second one is 264, they are light and enjoyable reading, and I was through them in a flash.

 photo lifewithlily_zpsc0af8377.jpgThe first book, Life with Lily, introduces Lily Lapp as a five year old girl, living in New York. Her Amish community is tight knit, and her family is young, but growing. In fact she and her younger brother are surprised with a new baby brother early in first chapter. I am friends with a midwife to the Amish, and I know first hand that babies are always a surprise. They never speak of their coming, and I've heard the comment that children even think maybe the midwife brought the baby in her bag! I loved how they portray this in the story, as a special surprise gift from God. As Lily grows and learns new lessons, they are told from her perspective. It's a beautiful inside look at life as she learns about school, friendship choices, hard work, financial hardship, and big changes. It is all painted into the setting of the simple farm life the Amish lead, and their Faith intertwining with their life on every level.

The second book, A New Home for Lily, begins with another big change, as Lily's family moves to Pennsylvania. She has to begin in a new school, and make new friends. Her family has to adjust to a new church, with slightly different rules. They never complain, and they teach Lily to love and serve in a way that honors her Faith. Her family grows again, as her third brother arrives, and many other changes in her life take place. The story line follows her intense disdain for a little boy in her school who teases her. Yet in the end of the book, her kindness to him helps bringing their community together in new and special ways. The book ends with her entering the 4th grade. I think this book was the best of the two. Now I'm anxious to read the 3rd book in the series, due out in July.

We also enjoyed exploring the website, The Adventures of Lily Lapp, where there are quizzes, games, contests and giveaways. Be sure you hop over there too!

Bottom Line:
I loved these books, and while they are fiction, I found them to be very accurate to REAL life. My daughter loved them too. They are factual, yet entertaining. Colorful and delicious (oh the food!), they are filled with Faith and family love. For a good story, and a window on a lifestyle we don't see often, they hit the mark. I would recommend them to any young girl, like the one inside me. ;)

(PS:  I really do try and come up with pros and cons on every review, but this is my HONEST opinion: these were just plain good! No big agenda, or anything, but very entertaining and a bit educational.)


To read other's thoughts on these two books, visit the Crew Blog!

Photobucket

©2012-2013 Loving and Learning on the High Plains. All rights reserved. All text, photographs, artwork, and other content may not be reproduced or transmitted in any form without the written consent of the author. http://www.homeschoolhighplains.blogspot.com
 photo DisclaimerGraphic1_zpsf612f371.gif
*Prices and links are accurate at the time this is published, and are subject to change.

Thursday, June 20, 2013

Artists abound

These short photo posts may be all you see of me until ball season is done.  We are at the ball fields 5-6 days a week right now, and it's a blast. :) There are so many adventures I want to share here on my blog, but what little time I have is spent on washing ball uniforms, packing peanut butter sandwiches, and trying to maintain the chores and gardening at our much neglected home. I am taking lots of pictures, and will be sharing lots soon. Summer is just SO much fun!

So here's another picture, us enjoying a local art fair:


©2012-2013 Loving and Learning on the High Plains. All rights reserved. All text, photographs, artwork, and other content may not be reproduced or transmitted in any form without the written consent of the author. http://www.homeschoolhighplains.blogspot.com

Tuesday, June 18, 2013

Wordless Wednesday: a Photo Parade of Farmer's Market Goodness

It's been a crazy week, but I hope to have lots more posted soon. Until then, I'll share a bright and happy hour I spent at the Farmer's Market this past weekend... This is where I sell my granola. :)

click on the images to make them larger. :)

Linked:
Wordless Wednesday on Only Passionate Curiosity
Pea of SweetnessGrab Our Button! 

@ 5 minutes for mom


©2012-2013 Loving and Learning on the High Plains. All rights reserved. All text, photographs, artwork, and other content may not be reproduced or transmitted in any form without the written consent of the author. http://www.homeschoolhighplains.blogspot.com

Sunday, June 16, 2013

The job of a Father

Ben, helping baptize Tyler, summer 2012


Deut. 6:4-9 “Hear, O Israel! The Lord is our God, the Lord is one! You shall love the Lord your God with all your heart and with all your soul and with all your might. These words, which I am commanding you today, shall be on your heart. You shall teach them diligently to your sons and shall talk of them when you sit in your house and when you walk by the way and when you lie down and when you rise up. You shall bind them as a sign on your hand and they shall be as frontals on your forehead. You shall write them on the doorposts of your house and on your gates.

My Daddy

Linked:
Scripture and Snapshot


©2012-2013 Loving and Learning on the High Plains. All rights reserved. All text, photographs, artwork, and other content may not be reproduced or transmitted in any form without the written consent of the author. http://www.homeschoolhighplains.blogspot.com

Friday, June 14, 2013

Review: Memoria Press Geography I

 photo mp_header_zps9aa8d9dc.jpg

Over the past few weeks we were very blessed with a free copy of Memoria Press's product: Geography I set. This set of books is for 4th-8th grade, and retails for $48.00 (a $4.80 savings off of individual prices). You also can purchase the books separately:
  • Geography I: Middle East, North Africa, and Europe $14.95
  • Geography I: Middle East, North Africa, and Europe Student Workbook $11.95
  • Geography I: Middle East, North Africa, and Europe Teacher Guide $12.95
  • United States Student Workbook $5.00
  • United States Teacher Key, Quizzes, and Tests $7.95
 photo Geography1-CompleteSet_zps84b09173.png

Geography I: Middle East, North Africa, and Europe Student Text (103 pages), is a student text for daily reading. It begins with a page of teaching guidelines, which recommend covering 2-3 countries per week. This book goes well with the Geography I: Middle East, North Africa, and Europe Student Workbook (90 pages). As they read the one page in the text on each country, they can test their knowledge by filling in the blanks in the workbook.  If you have more than one student, you can share the text and purchase extras of the consumable workbook. I think they are very reasonably priced for this!

The text begins with an introduction on geography (2 pages) and then moves right into each of the countries covered. This edition covers:

The Middle East

  • Israel
  • Jordan
  • Syria
  • Lebanon
  • Iraq
  • Iran
  • Turkey
  • Saudi Arabia
  • Pakistan
  • Afghanistan

North Africa

  • Egypt
  • Sudan
  • Libya
  • Tunisia
  • Algeria
  • Moroco

and Europe

  • Mediterranean Europe: Greece, Italy, Spain, Portugal, France
  • Central Europe: Switzerland, Austria, Germany, Netherlands, Belgium
  • The British Isles and Low Countries: United Kingdom, Ireland
  • Scandinavia: Norway, Sweden, Denmark, Iceland, Finland
  • Eastern Europe: Russia, Baltic States, Belarus and Ukraine, Poland, Czech Republic and Slovakia, Hungary, Romania, Bulgaria, Albania, The Balkans

Finally, in the back of the book are full color flags for the kids to reference for the countries (The text is only two colors: black and blue) For each country there is a page of text covering the history (both ancient and recent) and some fast facts like: land-forms, major cities, flag, languages, capital city, climate, and resources. Then there is a full page map showing major political boundaries and bodies of water. There are a few geographical features noted, but this is not a detailed map.

The Geography I: Middle East, North Africa, and Europe Teacher Guide (131 pages) follows the text through each of these same countries, with the answers filled in the blanks of the workbook pages. It does break the European countries into the following sub-categories: Mediterranean Europe, Central Europe, The British Isles and Low Countries, [Review of Europe pt 1], Scandinavia, Eastern Europe I, Eastern Europe II, [Review Scandinavia and Eastern Europe], [Review Europe]. In the back of this book are (copy-able for multiple use) quizzes and tests and their answer keys.  The Student Workbook mirrors these categories and reviews.

The United States Student Workbook (25 pages)  and United States Teacher Key, Quizzes, and Tests (95 pages) are only a workbook and key for reviewing the text of their United States Curriculum (Not included in Geography I; geared for grades 4-6). We had not used that curriculum, but we did use it to review our studies in states and capitals from last year. It is broken into 4 sections, with 8 weeks (8 regions) of review for each section. The sections include:

  1. Naming states in each region on a blank region map
  2. Matching capital names to state names
  3. Matching capitals to their states on a blank region map
  4. Naming states and their capitals on a blank region map 
The final review is filling in blanks of capitals for each state, then filling in blanks of states for each capital. This entire review is spaced out for a once a week activity for an entire traditional school year (32-36 weeks).

How we used it:

We made a goal of covering one country per day in the text, 2-3 days per week. It was easy to sit down and read it together. I used this primarily for my 4th grade daughter, Emma, but Tyler (5th grade) enjoyed it too. We would then fill in the blanks on the workbook, and discuss the flag and map. It took only about 20-30 minutes per day to complete, and we had no trouble covering the Middle East section during the review period. Each day we also reviewed the regional map of the Middle East and the kids can now name each and every country on that map. This is SO important to me, especially considering current events in the news.  We used the first section of the US States Review book as well. 

What I liked:

  • This is a straightforward approach to a good geography overview of this region of the world. 
  • The text is not too long and the facts are easy to retain. 
  • The instructions are simple to follow and I was not lost on how to teach it. 
  • The quizzes and tests in the teacher guide are reproducible for multiple students within the home, so I need only buy more workbooks. 
  • The workbooks are reasonably priced!
  • The ancient history part focuses on ways these countries tie in with Bible history, where applicable. 
  • The text is age appropriate and reads easily at a 4th grade level. 
  • The paper is of a quality weight, and the soft-covers seem pretty durable.
  • The way it is already broken up into a schedule for a traditional school year. 

What I didn't like:

  • This focuses mostly on political borders and not so much on topographical features. This means the text will be outdated more easily as some regions undergo constant political change. This would somewhat negate the value of buying a text and teacher guide and using new workbooks for all of your up-coming students as they pass through this grade. 
  • All of the illustrations are black and white, with the exception of the flags in the back of the student text-book.

 photo PL_completeSet_zps91680a55.pngBottom Line:

We liked this curriculum very well. It doesn't have a lot of frills but it gets the job done! The kids easily picked up the country names and were quickly able to name everything in the region. We plan to continue using these books throughout the coming school year. The value of what you get for your $ can't be beat!

But don't just take my word for it. :) 
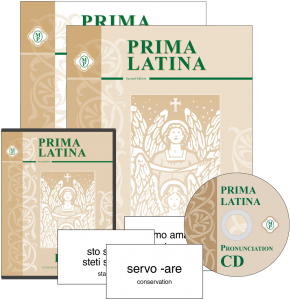
Please read other reviews of Geography I or of Prima Latina (see image right), also from Memoria Press, by visiting the crew blog here:

Photobucket

©2012-2013 Loving and Learning on the High Plains. All rights reserved. All text, photographs, artwork, and other content may not be reproduced or transmitted in any form without the written consent of the author. http://www.homeschoolhighplains.blogspot.com
 photo DisclaimerGraphic1_zpsf612f371.gif
*Prices and links are accurate at the time this is published, and are subject to change.

Wednesday, June 12, 2013

Wordless Wednesday: Rainbows


Rained out of a ballgame last week. :)


Linked:
Pea of SweetnessGrab Our Button! 

@ 5 minutes for mom


©2012-2013 Loving and Learning on the High Plains. All rights reserved. All text, photographs, artwork, and other content may not be reproduced or transmitted in any form without the written consent of the author. http://www.homeschoolhighplains.blogspot.com

Tuesday, June 11, 2013

M is for Muffins

We tried this recipe I found in the newspaper last week. I tweaked it a bit, using soured raw milk, and it turned out AWESOME. Hubby loved it, so will be making again and again. :)


Muffins:

1 1/2 cups all-purpose flour
3/4 cup white sugar
1/2 teaspoon salt
2 teaspoons baking powder
1/3 cup vegetable oil
1 egg
1/3 cup sour milk or buttermilk
1 cup fresh blueberries


Crumb Topping, mix with fork until crumbly:

1/2 cup white sugar
1/3 cup all-purpose flour
1/4 cup butter, cubed
1 1/2 teaspoons ground cinnamon


Preheat oven to 400 degrees F and  line 12 muffin cups with paper liners. In a bowl, combine the flour, sugar, salt and baking powder. Add oil and buttermilk. Beat egg slightly with a fork. Mix this with flour mixture and fold in blueberries. Divide among the 12 muffin cups, and sprinkle with crumb topping mixture, about a Tbs of topping per muffin. 

Bake for 20-22 minutes or until done, which means when a toothpick is inserted, it comes out just barely clean. Caution: Err on the side of under baking for the yummiest, moistest muffins.

Mary says:
"he called them blueberry muffins, but I call them Einstein Muffins. That’s because every time I make them, I feel like a genius. And you can feel like a genius, too—provided you follow these recipes exactly. "

Linked:

  Blogging Through the Alphabet

©2012-2013 Loving and Learning on the High Plains. All rights reserved. All text, photographs, artwork, and other content may not be reproduced or transmitted in any form without the written consent of the author. http://www.homeschoolhighplains.blogspot.com

Monday, June 10, 2013

Review: Birdcage Press Go Fish Cards Impressionist Art


Birdcage Press Logo photo Birdcage-logo_zpsa3a9555b.jpgWe were SO COMPLETELY EXCITED to receive a free set of Go Fish For Impressionist Artists cards from Birdcage Press, for our review this month!

Designed for kids (and adults) ages 7 and up, this fun and easy card game and book was an absolute delight to review. We had recently visited a couple of great art museums, including the Nelson-Atkins Museum of Art in Kansas City and the Denver Art Museum in Colorado, for the special Becoming Van Gogh exhibit. It was easy to see that the kids really loved and appreciated the impressionist art pieces best. I'm sure my bias towards these had no sway on theirs. ;) Knowing this, I jumped on the opportunity to review these wonderful cards. We sat down and played with them the entire weekend after they arrived.

One of my goals for visiting art museums is to help my kids to have a real appreciation for art, develop a taste, and to familiarize them with artists' names and names of specific art pieces. If you've ever visited one of these museums you know how overwhelming the experience is. As we walked away we knew of a few we liked, but were on information overload! This is why these cards were created:

I first began creating games as a way to make learning more fun for my three young children. We made them up together, pairing favorite card games with different periods of art and history. I wrote a book to go with each game and my children acted as my editors. They made sure every fact in each book was interesting and easy to understand for readers of all ages. -Wenda O'Reilly, Ph.D. 

So after a full weekend of play, I was sure the kids would be tired of the cards. But instead they asked to play with them again and again. It's a new family favorite.

The included book gives a few facts and details about each artist, and the kids have now learned how to pronounce the names of the 8 impressionist artists featured:

  1. Edouard Manet
  2. Camille Pissarro
  3. Edgar Degas
  4. Berthe Morisot
  5. Claude Monet
  6. Auguste Renoir
  7. Mary Cassatt
  8. Gustave Caillebotte

The main way to use the cards is to play Go Fish, trying to collect each of the four featured paintings of each artist. The only hard part was shuffling the cards. We found that they were too large and thick to shuffle the traditional way. It was much easier to just scramble up a pile of them on the table to shuffle. They are very nice and durable cards!

We have also used the cards as flashcards, covering the bottom half, and they have learned to name each artwork featured.  Emma sat down just today and named 35 out of the 36 cards without looking at titles. I think this is fantastic, and I look forward to collecting all of the art cards.

Bottom Line:
This is a quality product, and fun for all ages. At $11.95, this is well within our gift budget and might make the list for cousins for Christmas. *don't tell them!* I would recommend these cards as a fun way to supplement any art appreciation curriculum.

I would be remiss to note, as with all art, some discretion may be advised. When some friends come over there is 1 Degas card we remove from the deck. Not on the level of "David" nudity, but may not be for all palates.


Go Fish - Impressionist Artists photo birdcage-gofishforimpressionistartists_zpsacca0576.jpg


To read other reviews of several different Birdcage Press products, visit the crew blog!

Photobucket

©2012-2013 Loving and Learning on the High Plains. All rights reserved. All text, photographs, artwork, and other content may not be reproduced or transmitted in any form without the written consent of the author. http://www.homeschoolhighplains.blogspot.com
 photo DisclaimerGraphic1_zpsf612f371.gif
*Prices and links are accurate at the time this is published, and are subject to change.

Friday, June 7, 2013

3 Thrifty Day Trips for Homeschoolers

When you homeschool, the budget isn't always there for big vacations. Day trips are a great solution, and you can count it as a school day! Our family loves to take advantage these to break the educational doldrums; we just can't let them break the bank.

Today I'm a guest author over at Thrift Schooling. Click through to read the entire article, and find 3 fun and thrifty day trips!


©2012-2013 Loving and Learning on the High Plains. All rights reserved. All text, photographs, artwork, and other content may not be reproduced or transmitted in any form without the written consent of the author. http://www.homeschoolhighplains.blogspot.com

Wednesday, June 5, 2013

Wordless Wednesday: Beauty


Linked:
Pea of SweetnessGrab Our Button! 

@ 5 minutes for mom


©2012-2013 Loving and Learning on the High Plains. All rights reserved. All text, photographs, artwork, and other content may not be reproduced or transmitted in any form without the written consent of the author. http://www.homeschoolhighplains.blogspot.com

Tuesday, June 4, 2013

Home Made Fried Chicken

There is nothing quite like home grown chicken cut up and fried. :) This week we'll be ordering our next batch of fryers... this time not so many (last year we did 115!) just enough for us to take a couple to the fair. So to remind myself it's worth it, I pulled a chicken from the freezer and made fried chicken again... and of course, tweaked the recipe a little more. ;)


I used a Food Network recipe from Paula Deen, and made some adjustments. 

Ingredients:
3 eggs
1/3 cup water
1/3 hot red pepper sauce 
2 cups flour sifted with 1 Tbs. baking powder
1 package of crushed saltine crackers (my addition)
1 teaspoon pepper
1 (1 to 2 1/2-pound) chicken, cut into pieces
Oil, for frying, preferably peanut oil, but I used Canola with good results

House Seasoning:
3/4 cup salt
1/4 cup black pepper
1/4 cup garlic salt
1 Tbs. onion powder
Mix ingredients together and store in an airtight container for up to 6 months.
Directions
In a medium size bowl, beat the eggs and mix with the water and enough hot sauce so the egg mixture is orange. In another bowl, combine the flour, crackers, and pepper. Season the chicken with the "house seasoning". Dip the seasoned chicken in the egg, and then coat well in the flour mixture.

Heat the oil to 350F in a deep pot. Do not fill the pot more than 1/2 full with oil.

Fry the chicken in the oil until brown and crisp. Dark meat takes longer then white meat. It should take dark meat about 13 to 14 minutes, white meat around 8 to 10 minutes. Keeping the oil temp at 350F was important. I also preheated the oven to 350F, keeping a glass baking dish in there to hold the pieces that came out of the fryer as I worked in batches. I fried the dark meat first, then moved it to the glass pan in the oven, then I fried the white meat second. It worked really well that way. :)

For more on our chickens from last year, and how to cut up a whole chicken, see my original post here
~~~~~~~~

Linked:

Frugal Family 2013 

©2012-2013 Loving and Learning on the High Plains. All rights reserved. All text, photographs, artwork, and other content may not be reproduced or transmitted in any form without the written consent of the author. http://www.homeschoolhighplains.blogspot.com

LinkWithin

Related Posts Plugin for WordPress, Blogger...